Category Archives: Uncategorized
New Site!!
Hi Everyone!!
Sorry for not doing this sooner – but my food blog has moved to a NEW and highly improved site. 🙂 The new site has many exciting features, including a recipe index, a recipe icon in each post. Be sure to also check out my “Take Home Treats” page for those of you in the DC area.
Anyway, I hope my site move won’t deter you from reading about my culinary concoctions….
To visit the new site, click here!
Or, copy and paste this into your web-browser and add it to your favorites! http://culinarycarol.com/
Thanks and hope you will continue with me on my culinary adventures! 🙂
As always, happy eating!
-Carol
Ode to the Chickpea – Chickpea Fritters
I. love. chickpeas! (also known as garbonzo beans). I probably eat chickpeas at least 5 days a week..usually in the form of hummus, but I enjoy them in their whole form too. And in their crunchy snack form via Simply 7 snacks. 🙂 They’re great in salads, as hummus, falafel, in stews, curries and soups, well you get the idea. Come to think of it, probably one of my most *favorite* dishes from a trip to Barcelona was a delicious chickpea dish from Pinotxo, a tapas bar in La Boqueria (aka the famous market in Barcelona). I’m drooling just thinking about it….
Just look at those de-licious chickpeas!! Simple flavors and simply divine. Buuuuut, I digress. Although seriously, if you ever go to Barcelona, you MUST go to this tapas bar in La Boqueria. You won’t be sorry..neither will your stomach. Besides the obviously delicious chickpeas, there are yummy snails, salt cod fritters, calamari, ham..lots of ham… sorry digressing again. Back to today’s post on chickpea fritters!
This is a great recipe and use of chickpeas. And by now you know, I’m a lover of easy recipes too. (This one was so easy that I made this at 10:30pm at night..it’s really that easy!) This one is also a keeper for use over and over again. Here are our cast of characters:
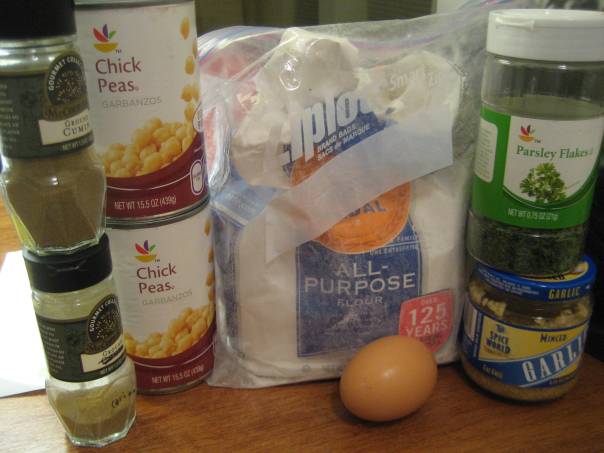
– 2 cans of chickpeas, rinsed and drained
– 4 cloves of minced garlic
– large handful of parsley (i used dried parsley)
– 1 teaspoon ground cumin
– 1/2 teaspoon ground coriander
– 1 large egg
– 1/4 cup of chickpea flour (i used all-purpose since that’s all i had)
– salt and pepper for seasoning
– paprika (optional)
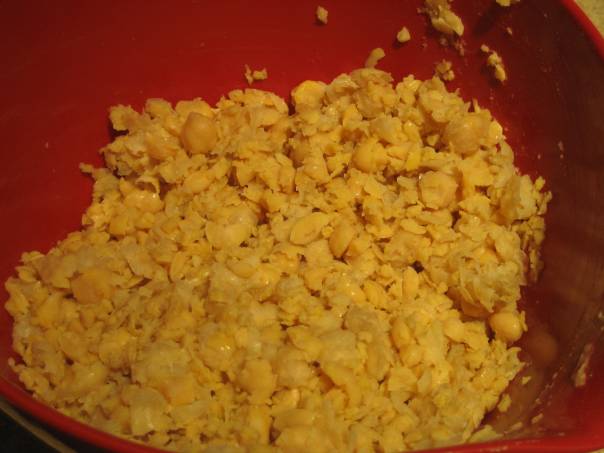
Open your cans of chickpeas and pour into a colander to drain. Rinse them under cold water to get the gross canness off of them. Pour them into a large bowl and using a potato masher, mash the chickpeas. Weirdly enough, one of the few kitchen gadgets I don’t own is a potato masher. So I used the combination of a spoon (using the back of the spoon to mash) and a fork. Admittedly, this takes a bit longer than if I had used a potato masher, but I did this while watching a movie and before I knew it, the chickpeas were sufficiently mashed. It’s also fine to leave a few of the chickpeas whole.
Add your garlic, parsley, cumin and coriander to the bowl. I also added a little bit of smoked paprika for additional flavor and if you wanted some heat in your fritters, you could also add a pinch of cayenne pepper.
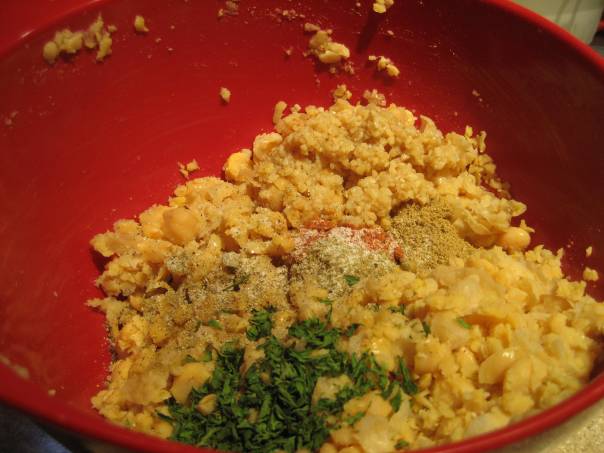
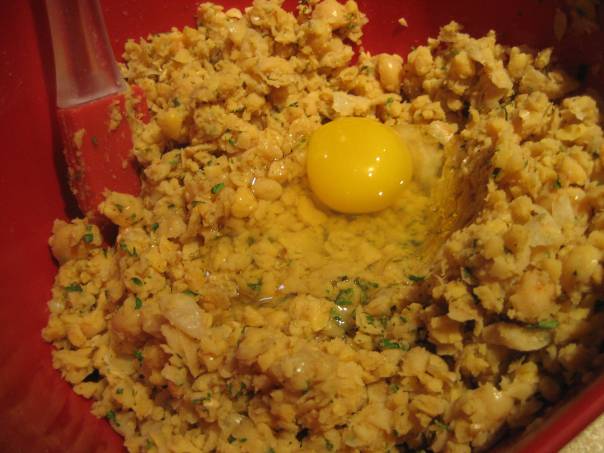
Using your hands, mix well. Add some salt and pepper for additional seasoning. Mix well to combine. Add the egg…
…and continue to mix/mash with your hands. You can also mash any of the remaining whole or chunky pieces of chickpeas during this process.
Add the flour..
…continue mashing/mixing with your hands until everything is combined well. Just a note here – the original recipe I found calls for chickpea flour, which I didn’t have. I used all purpose flour as a substitute, and I thought the fritters turned out just fine, especially since the recipe only calls for 1/4 cup.
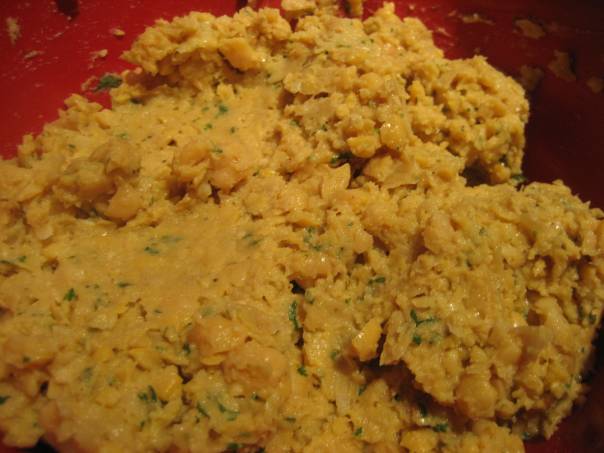
Using a 1/4 measuring cup, measure out a portion of the chickpea mixture and form into a patty. Repeat and continue making patties until all the mixture is gone. This made about 13 patties total, but depending on size, this recipe could yield between 12-14 patties.
Heat up some olive oil in a pan. Once the oil is hot and begins to sizzle, slowly add your patties to the pan. Fry the chickpeas until they are golden brown, about 3 to 4 minutes on each side.
Drain on a wire rack and let cool. Last, but not least, serve!! You can eat them as is, serve them with a yogurt/tzatziki sauce, olive oil, or whatever else you want to dip them in.
This is such an easy and versatile dish. You can serve them as a side, wrap them in a pita with sauce for a sandwich, serve them on a salad, or just eat them as snack. However you want to “dish” them up, I hope you enjoy them as much as I do!
Here’s to the glorious little chickpea – oh how you satisfy my appetite!!! 🙂
Quick Coq Au Vin
This is a fantastically easy (and quick!) recipe for coq au vin which usually requires a long cooking time. What is coq au vin you say? Well in case you couldn’t tell, it’s a French dish with fairly similar flavors to another French classic, beef bourguignon. Coq au vin usually consists of meat (braised), wine, mushrooms, lard, onions, etc. Today’s version is a quick cooking and healthy version of the classic coq au vin. Here’s what you’ll need:

– 2 chicken breasts
– 14 ounces low sodium chicken broth
– 1/2 cup of dry red wine
– 1 onion, finely sliced
– 1 to 2 cups of mushrooms, sliced
– 2 carrots thinly sliced
– 1 teaspoon crumbled, dried rosemary
– 1/4 cup of flour
– 1/4 cup of water
– 1 tablespoon of tomato paste
– parsley
– olive oil for cooking
– salt and pepper for taste
Place the flour in a shallow dish. Slice your chicken breasts in half so that you now have four portions of chicken. Two portions may be smaller but thicker and the other two may be larger but thinner. Season both sides with salt and pepper. Dredge the chicken pieces in the flour.
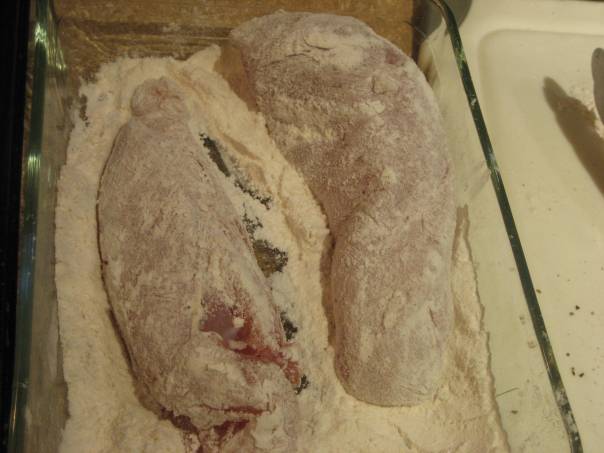
Heat up some olive oil in a pan over medium high heat. Once the oil is hot, add the chicken and cook on each side for a couple of minutes, until both sides are slightly browned.
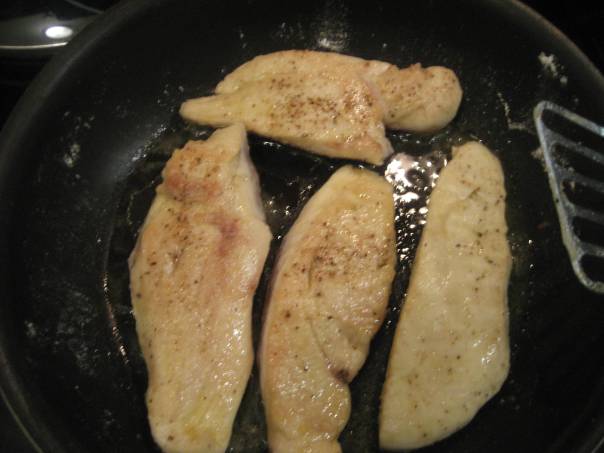
Meanwhile, whisk the flour with 2 tablespoons of the leftover flour and set aside for later. Once your chicken breasts are browned on both sides, remove from the pan and set aside. Add some additional olive oil in a pan and heat up the oil. Add the onions, carrots mushrooms and rosemary.
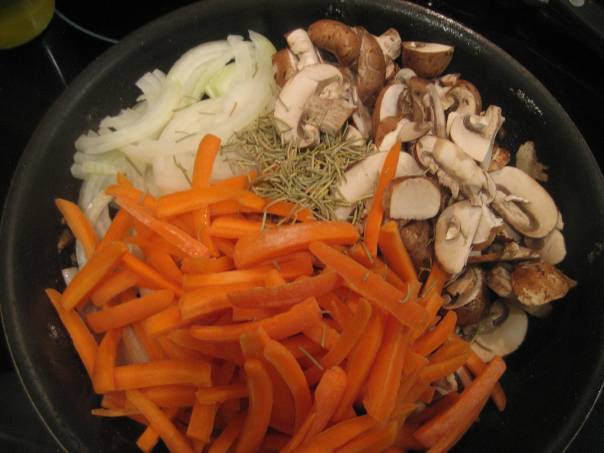
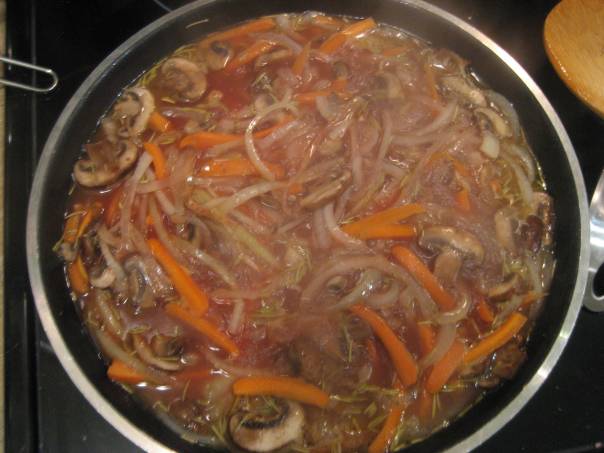
Stir to combine and cook the vegetables until they begin to soften and brown slightly, about 5 minutes. Add the chicken broth, red wine and tomato paste. Season with some additional salt and pepper.
Stir until the tomato paste has combined and bring the liquid to a simmer. Once the liquid is simmering, add your chicken back to the pan.

Cover, reduce the heat to maintain the simmer and cook, stirring once or twice until the chicken is cooked through. Transfer your chicken to a serving plate/dish. Increase the heat to medium high and stir the water-flour mixture into the pan with the sauce.

Cook, stirring, until the sauce is thickened, about a couple of minutes. Once the sauce has finished cooking you should have a thick, almost gravy-like delicious sauce.

Pour over your chicken and serve your deliciously healthy coq au vin! The flavor in this dish is rich and delicious, as there is a heartiness to the chicken and sauce from the braising in the red wine. The rosemary and mushrooms also adds a nice earthy undertone to the entire dish.

I served this with a delicious balsamic onions and green bean veggie dish and some olive oil and garlic cous cous and it made for a simply scrumptious and healthy dinner!
Mini Grasshopper Pies
Happy New Years Eve everyone! 🙂
This post is another chapter in my quest to master the making of little potted pies! In case you’ve missed earlier posts, I’ve already made mud pies, pumpkin cream and for Christmas, white chocolate peppermint pies. Today’s edition is the classic Grasshopper Pie. So hold on to your pants, lets get this pie party started! Here are our players:
– 3 cups of chocolate graham crackers or oreos, crushed
– 2/3 cups of sugar
– 1 and 1/2 stick of melted butter
– 24 large marshmallows OR one 16-oz container of marshmallow fluff
– 2/3 cups of warm milk
– 1/4 cups of creme de menthe liquer
– 2 Tablespoons white creme de cacao liquer
– 1 cup Cool Whip thawed
– Handful of Andes mints, chopped
– Extra Cool Whip for topping
– 12 to 16 1/2 pint mason jars
– Green food dye (optional)
– Fancy ribbon (optional)
– Homemade label (optional)
First things first – clean your mason jars that you will be using to make your pies in. I get mine from Amazon and use the Jarden Home Brands 12 pack 1/2pt wide mouth jars.
Crust
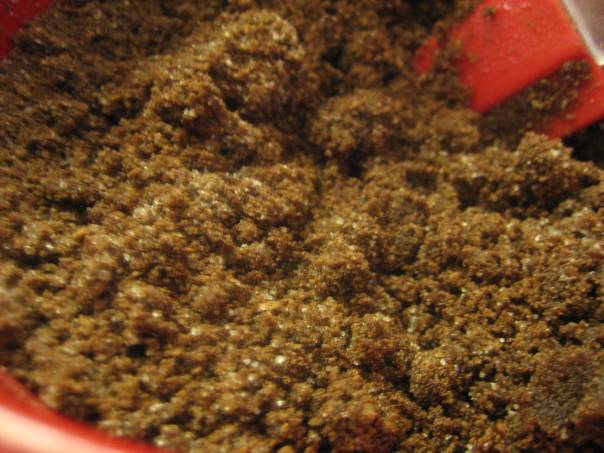
Using a food processor or blender, crush up your chocolate graham crackers or oreos. Or in my case, both! Double the chocolatey goodness. 🙂 1 1/2 packages of graham crackers will yield about 1 and 1/2 cups of the crushed graham crackers. You will need 3 cups of crushed chocolate crackers to make about 16 pies. In a small bowl, combine the melted butter, sugar and graham crackers. Use your fingers to combine well. For equal servings for the 16 jars, use a 1/3 cup measuring spoon and portion out the cracker mixture into each jar. Using your fingers press to form the crust at the bottom of the jars.
Freeze for a couple hours to firm up.
Filling
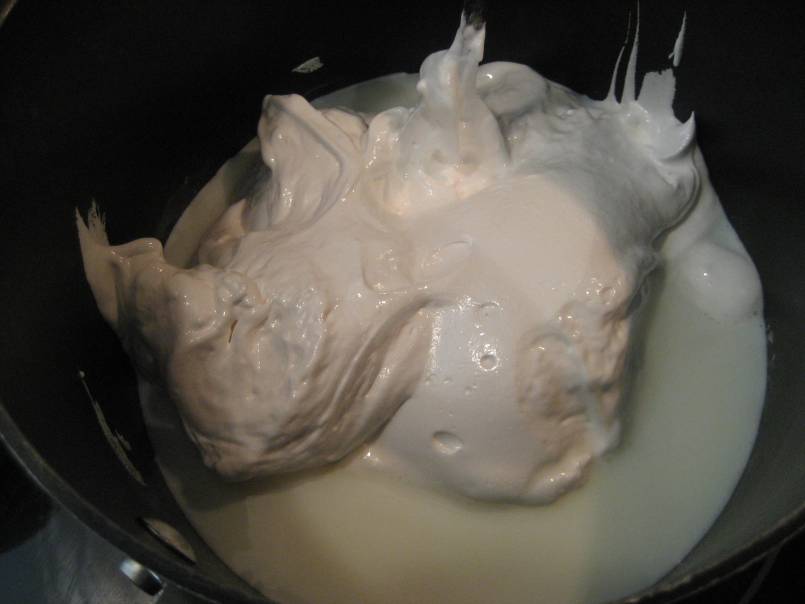
Heat up the milk in a saucepan over medium high heat. As the milk begins to heat it will start to get a little frothy. Add your marshmallow fluff (or marshmallows) and stir constantly until the marshmallow is melted and combined with the milk.
You should have a nice creamy mixture..
Place some ice in a large enough bowl that your saucepan will fit into.
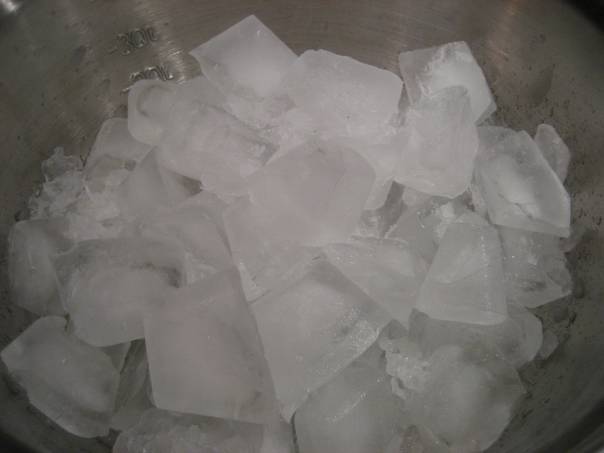
Remove the saucepan from the heat and place it in the bowl of ice. Continue to stir (whisk) constantly until the mixture has cooled down. The bowl of ice is simply to speed up the cooling process. Once the mixture is cool, add the creme de menthe and creme de cacao and mix to combine well.

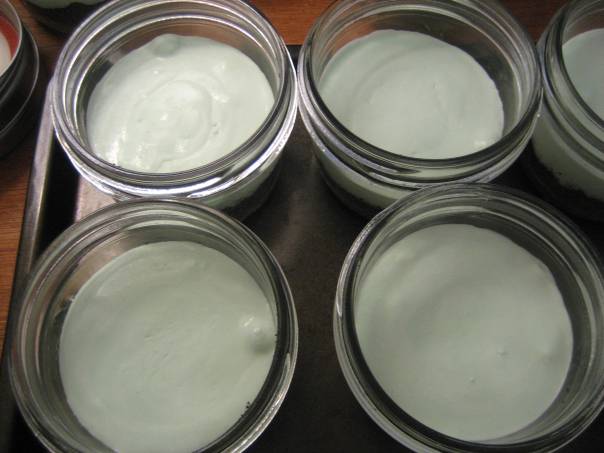
You can also add one or two drops of green food dye here, if desired. The creme de menthe I used was already green so I didn’t need the food dye to add the nice green tone to my pie. Sorry, it’s a little hard to see the green color, but it is green!
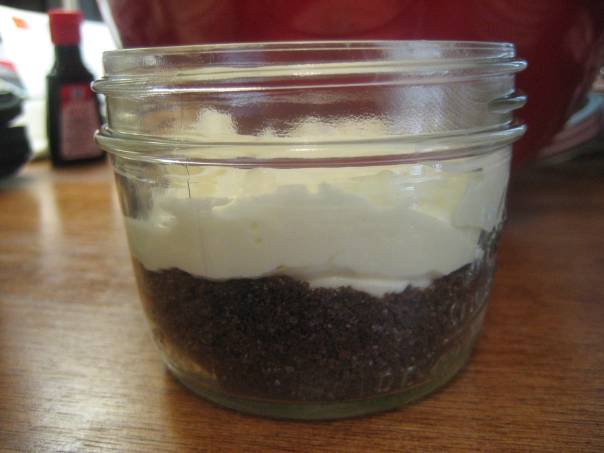
Fold in the cool whip and mix to combine well. Using the 1/3 measuring cup, portion out the filling into your jars on top of the frozen chocolate pie crust. If there is any leftover mixture, go ahead and disperse it evenly among your jars.
Return to the freezer for another 4 to 5 hours to let the filling firm up. While your filling is firming up, grab a handful of Andes mints and start chopping until you have a nice pile of chopped minty chocolateness…
Once the filling is firmed up, remove from the freezer and spoon out some of the thawed remaining Cool Whip on top of the filling. As the last and final and delicious touch, sprinkle the top of your pies with the Andes mints!

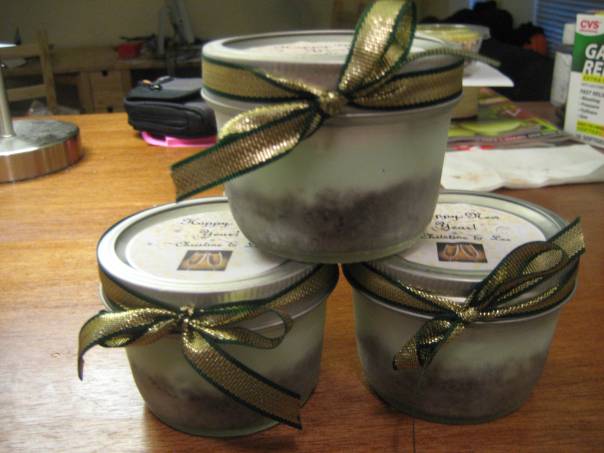
For a cute and finishing touch (especially if you are giving these as gifts), you can create some homemade labels. This was for my sister to give as gifts, so her labels are NYE themed..
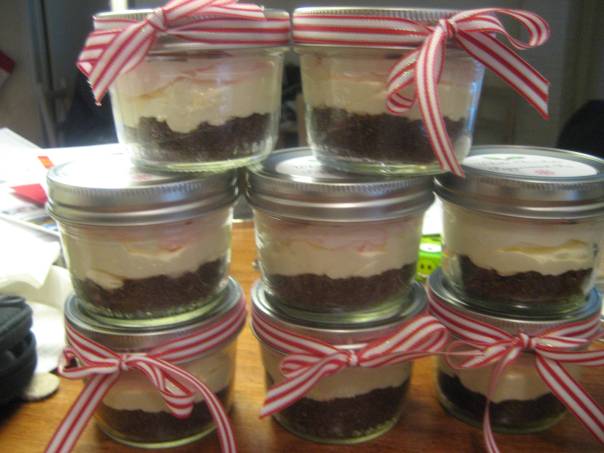
..tie some pretty ribbon to match your labels and pie around the jars…
The result is a super-cute, yummy in my tummy pie! 🙂 Enjoy and stay tuned to see what other mini pie creations I come up with!
HAPPY NEW YEARS EVE EVERYONE!! 🙂
Christmas Food Montage!
 Roasted carrots and rutebegas…waiting to be turned into delicious soup!
 Homemade mushroom pate ready for the beef wellington!
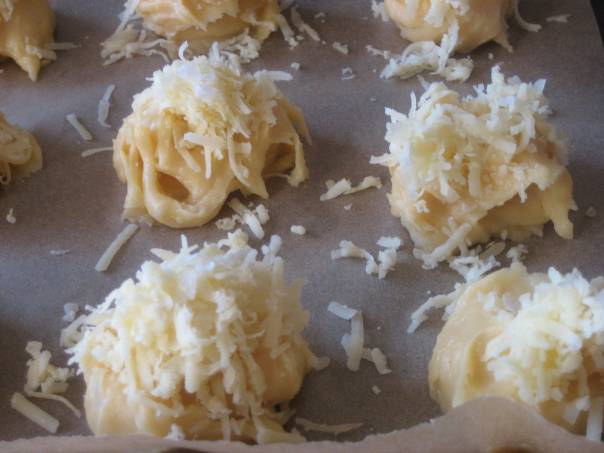
 Delicious Gougeres after. Nommmm!
 Carrot and rutebega soup with cardamom and carmelized bacon. YUM!
 Wellington in the making. Prosciutto, check. Spinach, check. Mushroom pate, check. Beef, check!
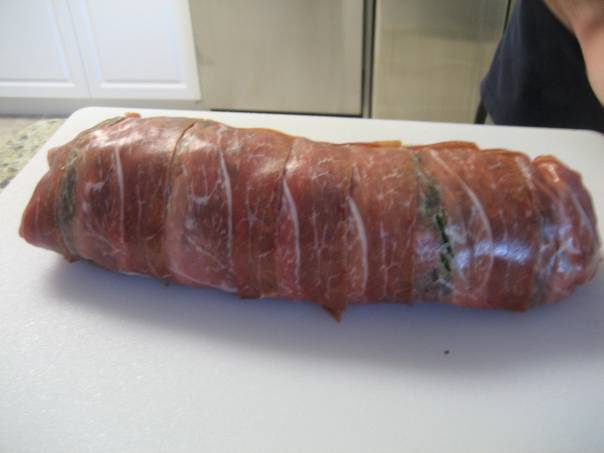 Wrapped up in a pretty package!
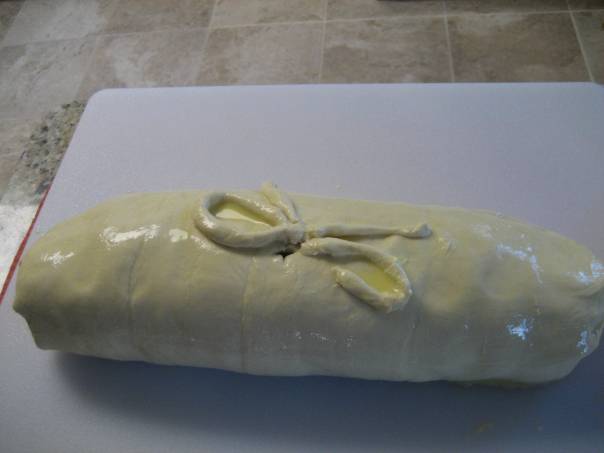 Snug in the pastry dough and with a bow on top! 🙂
 Squash gratin with butternut squash, acorn squash, onions and gruyere.
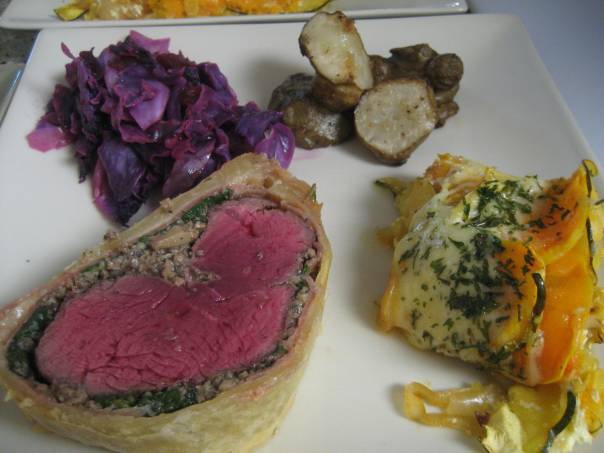 Christmas Dinner! Beef wellington, purple cabbage with cranberries, oven-roasted sunchokes, and squash gratin. Mmmm!
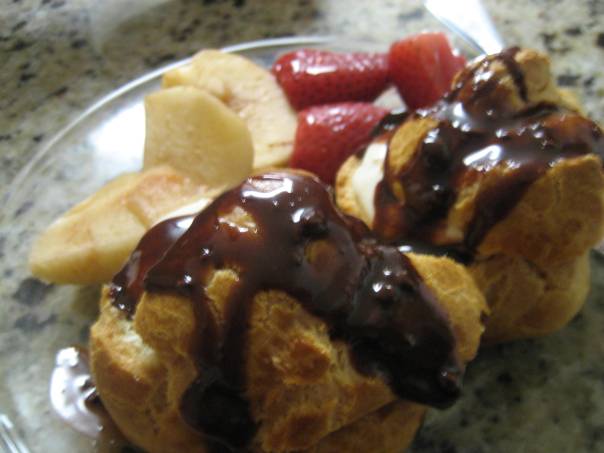 Christmas dessert! Homemade profiteroles with nutella glaze, spiced apples and strawberries! 🙂
Hope everyone had a deliciously fun Christmas! 🙂
Holiday Sweet Treats!
This post is dedicated to all the yummy treats inspired by the holidays! These two treats are sure to be a hit for any party and share one fun holiday ingredient: peppermint! So what are you waiting for, run to the grocery store, grab these ingredients and start making!
CHOCOLATE PEPPERMINT CUPCAKES
Take these to any holiday party, and I promise you won’t have any leftovers, so be sure to save one for yourself! 🙂 If you’re feeling really ambitious, you can make the cupcakes from scratch but if you’re looking for a time-saver, cake mix from the box works just as great. The secret to these holiday cupcakes are the home-made icing on top – it’s literally the icing on the cake!
Here are our holiday stars:
– Boxed cake mix, chocolate or devil’s food is the best
– Eggs (for the cake mix)
– Oil (for the cake mix)
– 6 ounces reduced fat cream cheese, softened at room temperature
– 1 stick of butter, softened at room temperature
– 3 to 4 cups of powdered sugar (depending on how sweet you want the icing)
– 1/2 teaspoon vanilla extract
– 1 teaspoon peppermint extract (more if youd like a stronger flavor)
– 1 to 3 Tablespoons cream (or milk if going the health route)
Prepare your cake mix according to the directions on the box. Place cupcake liners in your cupcake pan, and fill the liners about 2/3 full. Bake according to the directions.
While your cupcakes are baking, prepare the icing. In a small bowl using a hand mixer, mix the softened butter slightly. Add the 6 ounces of cream cheese and blend until combined with the butter, about 30 seconds. Slowly add the powdered sugar a little at a time, and blend on low speed until combined. Increase to medium speed and blend until the icing becomes fluffy. Add the vanilla and peppermint extract and blend until combined. Slowly add the cream (or milk), a bit at a time until the desired consistency is met. Beat until fluffy.
Refrigerate until use. To make your cupcakes pretty, you can use a piping bag and pipe the frosting on top of the cupcakes (or just spoon the icing on top), and top them off with a little bit of crushed peppermint chocolate. I used the holiday Andes Peppermint crunch. The result is a *simply divine* and delicious holiday cupcake!

Look how cute all of these yummy little cupcakes all together are. 🙂 How can you not want to eat a whole batch of these?

POTTED WHITE CHOCOLATE PEPPERMINT PIE
This yummy and cute holiday treat was inspired from my Halloween hit- potted pumpkin cream pies. Tweaked for the holidays by replacing the pumpkin cream with a scrumptious white chocolate peppermint cream. Topped with some fun holiday cool whip and some peppermint chocolate crunch, how can you not eat this cute little concoction? Here are our stars:
-1 1/2 cups of crushed chocolate graham crackers (about 1 package or a bit more)
– 1/3 cup of sugar
– 6 tablespoons of melted butter
– 2 boxes (3.5 oz) white chocolate instant pudding mix
– 2 cups of cold milk
– 1 container of cool whip thawed
– 1 to 2 teaspoons of peppermint extract
– red food dye
– handful of peppermint candy – I used Andes Holiday Crunch
– extra thawed cool whip
Crust:
In a food processor, crush about 1 package of the chocolate graham crackers. You should have about 1 1/2 cups of crushed graham crackers. If it’s not enough, go ahead and crush some more of the graham crackers. Mix in a bowl with 1/3 cup of sugar and the 6 Tablespoons of melted butter. Mix to combine well.
Using your fingers, press them into the bottom of the mason jars and chill in the fridge for a few hours.

Filling:
Combine the instant white chocolate pudding mix, cold milk, cool whip and 1 teaspoon of peppermint extract in a bowl. Mix to combine well and whisk until the ingredients have set and is a pudding consistency. Taste and make sure the filling has the peppermint flavor you are looking for. If you want the mint flavor stronger, add in another 1/2 tsp of extract.
Spoon the delicious chocolatey-mint concoction into the mason jars on top of the graham cracker crust. Chill for another few hours to let the filling set.
In the meantime, grab your peppermint candies. You can use starlight mints, the Andes holiday crunch, or even peppermint bark. Roughly chop up your holiday candies. These are going to be the topper for your pie.
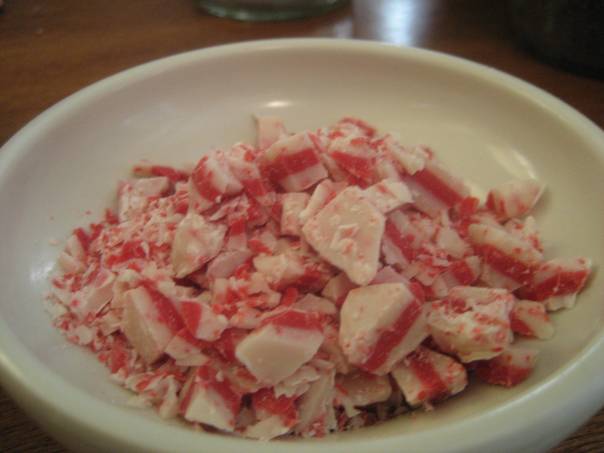
Once your pie has chilled, combine about 1 to 2 cups more of thawed cool whip and combine with a few drops of red food coloring. Using a spatula lightly mix to combine and get a swirled effect on the cool whip.
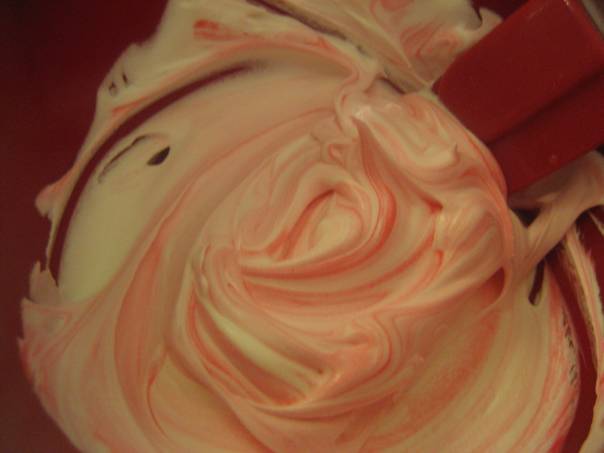
Dollop a large portion on top of each pie…
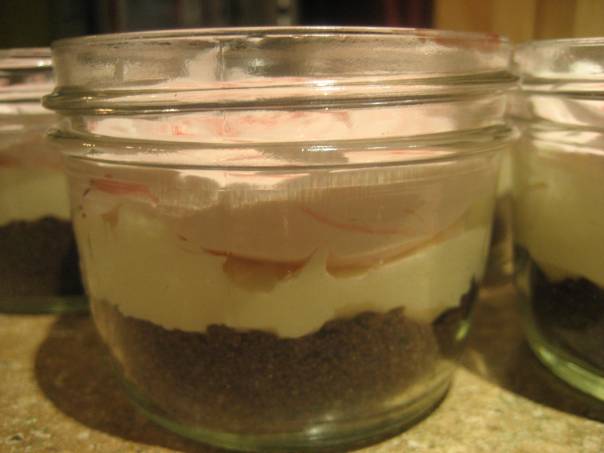
…..and top with your chopped holiday candies.
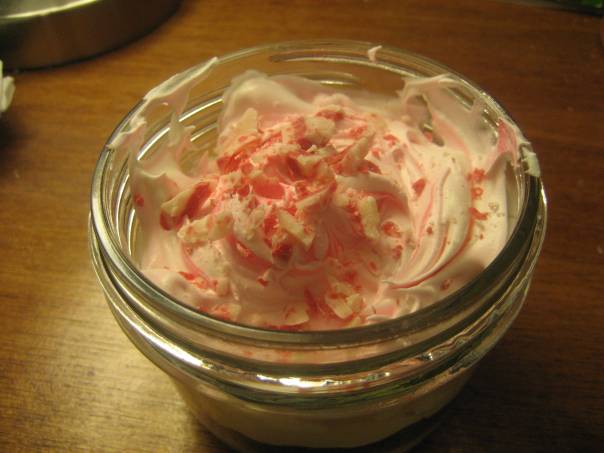
Let the remaining layers set in the fridge by chilling for at least 3 hours. You can spice up your peppermint pies with some fun labels and holiday ribbons. I made mine using a color printer and some holiday graphics and added the final touch with a nice red/white striped ribbon.
These are so cute, not to mention simply scrumptious and also make the perfect holiday gift! 🙂
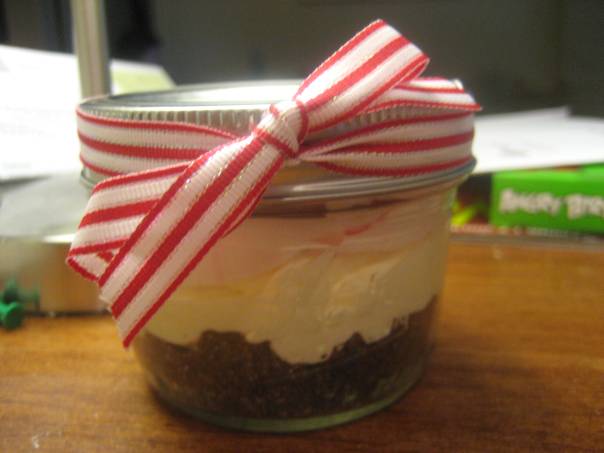
So stinking cute..not to mention yummy looking!

Happy Thanksgiving!!
Happy Thanksgiving my foodie friends! In honor of today, I leave you with a photo montage of all the wonderful foods of Thanksgiving. This year I am particularly thankful for my family and friends and for having a job and roof over my head. 🙂
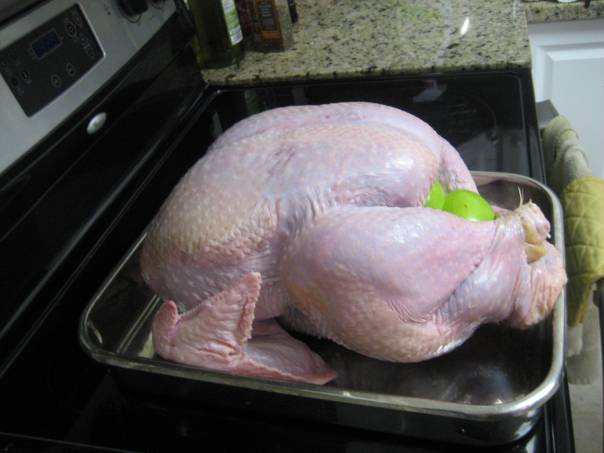
 Turkey stuffed with apples, onions and other delicious things!
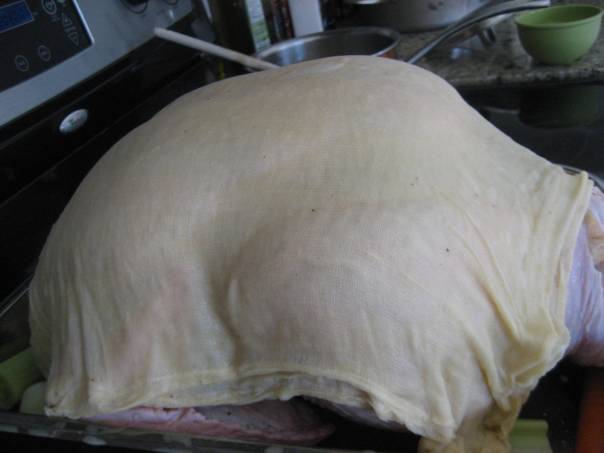
 delicious concoction of butter, cider, herbs, chili for the cheese cloth…
 sous vide smoked scallops served over curry cauliflower veloute sauce
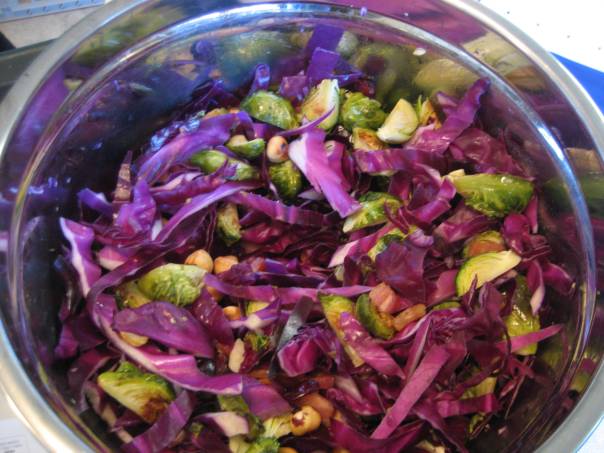 roasted brussel sprouts with cabbage and roasted hazelnuts and mustard vinagrette dressing
 lemony brioche stuffing with mushrooms and pinenuts
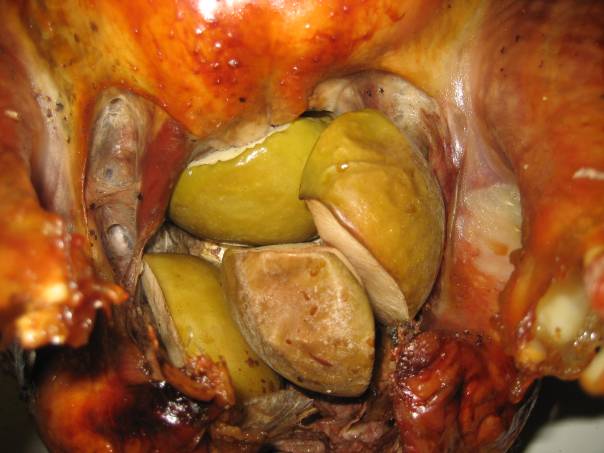 roasted turkey stuffed with apples
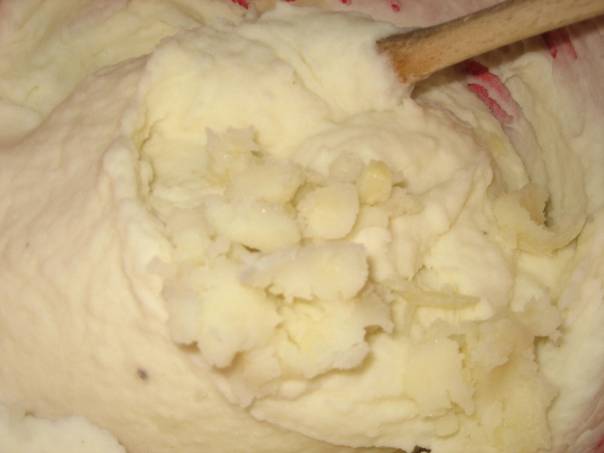 homemade garlic mashed potatoes
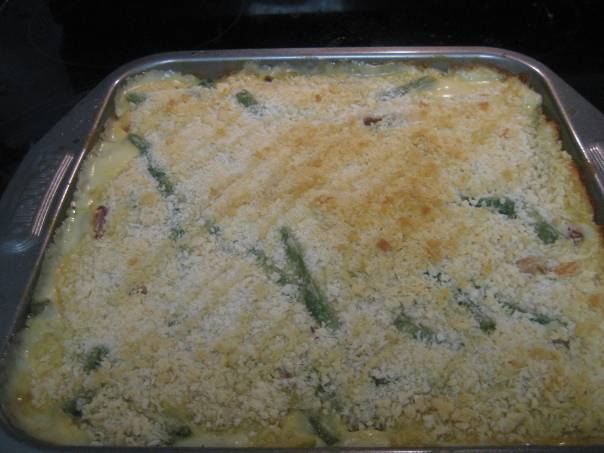 green bean casserole with a delicious cheddar sauce topped with panko breadcrumbs
 my glorious turkey feast! beautiful colors!
 pumpkin cheesecake with homemade whip cream and chocolate sauce
Happy Thanksgiving everyone! Reflect on all of your past blessings, marvel in your current blessings, and anticipate your future blessings. Be well and I hope everyone had a special day! 🙂
Me Oh My, Beef and Pie!
Here is the oh-so-exciting post I promised last week…! As with most of my posts, both were a “first” for me. I’ve eaten beef wellington and mud pie before (on separate occassions), but honestly never thought I’d find myself making either! Since it was Elliot’s birthday and both of these were items of request for his birthday dinner, I set out on an unexpected (and terrifying) culinary adventure..
Beef Wellington
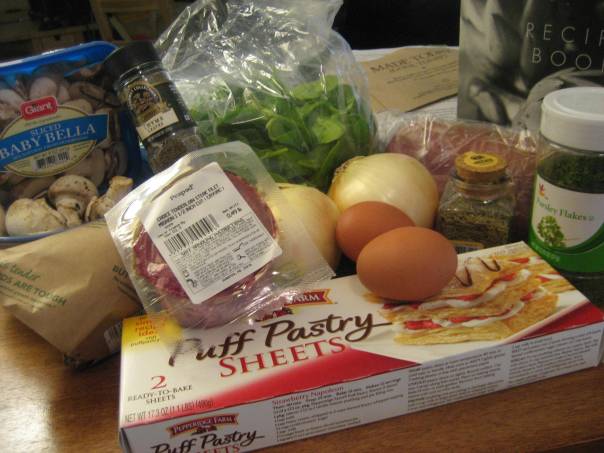
The mere thought of making beef wellington is terrifying. (Eating beef wellington, not so terrifying!) A perfect cut of filet mignon..pate..puff pastry..all wrapped up in a pretty little mouth-watering package. How can I not be terrified to make this? I did some research online and consulted my usual culinary go-to, my brother-in-law Lee for some help. Armed with lots of tips and reassurances, I felt much better about this culinary task. So, here are the players for our wellington:
– 2 half-pound filet steaks (aka filet mignon..the most perfect cut of meat ever)
– 2 sheets of puff pastry
– 1 lb of mushrooms
– egg
– slices of prosciutto
– parsley
– thyme
– rosemary
– 1/2 diced onion
– spinach
– oil for cooking
– salt and pepper for taste
Mushroom Pate
First thing is to make the mushroom pate. Traditional beef wellington usually uses a chicken liver pate (or so I’ve been told). There was no way in heck I was going to be buying or eating chicken livers. Via my internet research and culinary consultant, the nice substitution is a mushroom pate. You can buy pre-made mushroom pate from Trader Joe’s, but I opted to make my own. Dice up your onions and slice your mushrooms. In a saucepan heat up some oil and add the onions once the heat is hot. Saute the onions until they begin to soften. Add your mushroom and cook until browned.
Remove from the heat and add them into a bowl. Add your spices (parsley, rosemary, thyme).

I also added a little bit of lemon juice and breadcrumbs, but that’s optional. Stir to combine all the ingredients.
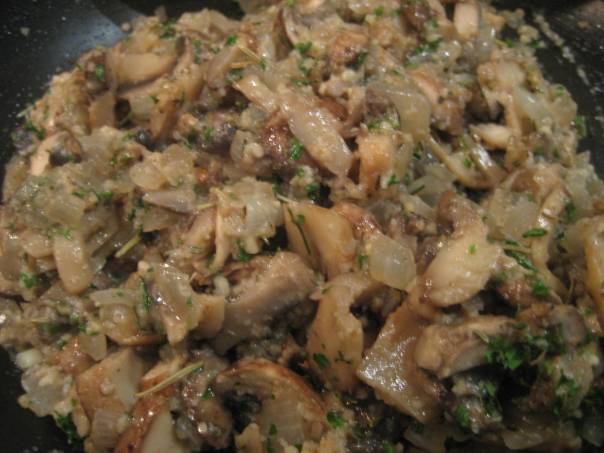
Now, whip out your food processor or blender. Pour the ingredients from the bowl into the food processor and blend. Your mushroom pate should now look a little something like this…
Set aside to cool. I did this the day before and kept it in the refrigerator.
For the wellington, you’ll actually want to leave a few hours for the whole process, and you’ll see why. Take out your filet and let them come to room temperature, probably an hour or two depending on how cold your fridge is. Once they are at room temperature, add some oil to a pan and turn your heat to High. You want the oil to be HOT so that you can get a nice sear on the meat. While your oil is heating up season generously both sides of your filet with salt and pepper.

When the oil is HOT, add your filets to the pan and sear the meat on all sides. You want to get a nice brown color on the meat…

Take the filets out of the pan, and let cool.

While the filets are cooling, roll out a large piece of plastic wrap. Lay out enough slices of the prosciutto (overlapping each other), enough to cover the entire filet…
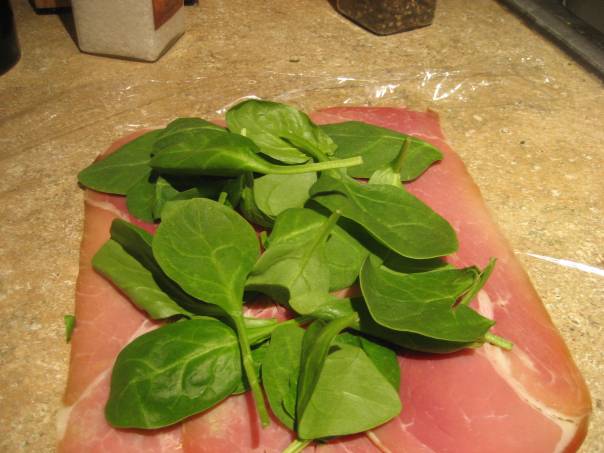
Cover your cooled filet with the mushroom pate and place in the center of the prosciutto and spinach.

Roll the prosciutto and spinach over the pate covered filet, using the plastic wrap so that you wrap it tightly. Wrap up the filet into a tight barrel shape, twisting the ends of the plastic wrap to secure.

Refrigerate for 10-20 minutes. While your filet packages are chilling, prepare the puff pastry. On a lightly floured surface, roll out the puff pastry to a size that will wrap around the entire filet. Unwrap the file package from the plastic wrap and place in the middle of the puff pastry. Brush the sides of the puff pastry with lightly beaten egg.

Fold the pastry around the fillet, cutting off any excess at the ends ( try to limit the overlap). Repeat these steps for your second filet.
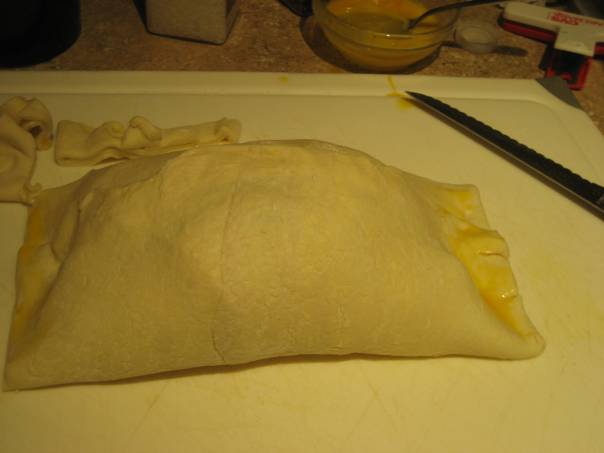
Place on your baking sheet, seam side down and chill for another 5 to 10 minutes. Pre-heat your oven to 350 F. Take the packages out of the fridge after 5-10 minutes and brush all exposed sides with some more egg wash.

Score the top of the pastry with a sharp knife, not going all the way through the pastry and sprinkle with some coarse salt. Bake in the oven for about 20-25 minutes. I checked mine after 25 minutes and then turned the heat up to 375 for another 5 minutes until the pastry was golden brown on top.

Remove the beef wellingtons from the baking sheet and let the meat rest for 5 to minutes before slicing. This lets the juices redistribute inside the meat so that when you slice it, it doesn’t spill out drying up the meat. After the meat has rested, slice up your golden brown wellington and serve!
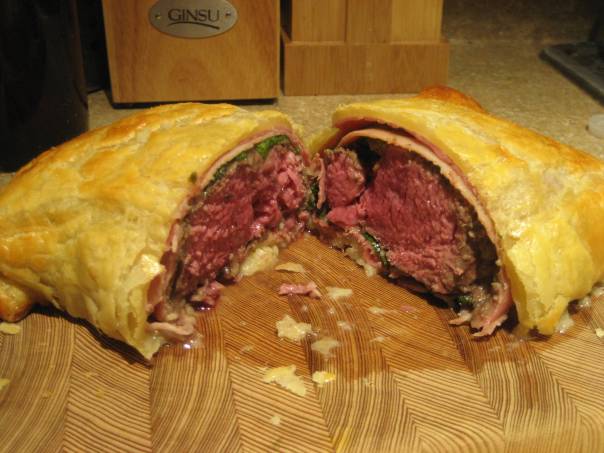
Served with a small side of the homemade mushroom pate, this was simply divine!!! The beef was so tender and flavorful and the prosciutto added a nice saltiness to the dish, finished off with the flakiness of the puff pastry. Mmmmmmm… All-in-all this was actually a lot easier to make than I had thought and was so worth the effort. Your stomach will be thanking you for making this delicious dish. Side note: One filet (about .49 ounces) made a pretty big wellington, so you could easily get away with making just one wellington, split in half for two people. I’m glad I made two though and am eagerly anticipating the leftovers! Onto dessert!
Frozen Mud Pie
This one’s just as easy as the beef wellington and only has 7 ingredients. No baking involved! Here are the players:
– 1 1/2 cups of oreo crumbs
– 4 cups (16 ounces) of softened coffee ice cream
– 6 tablespoons of melted butter
-1 teaspoon of sugar
– 1 container of thawed cool whip
– chocolate sauce or fudge (not pictured…oops!)
– sliced almonds (optional)
Whip out your food processor and add a handful of oreos in and pulse until the cookies are in crumbs. Repeat this until you have 1 and 1/2 cups of crumbs. In a small bowl combine the sugar, melted butter and oreo crumbs. Using your fingers, work to combine all of the ingredients. Pour the ingredients into your pie dish and press onto the bottom and up the sides.
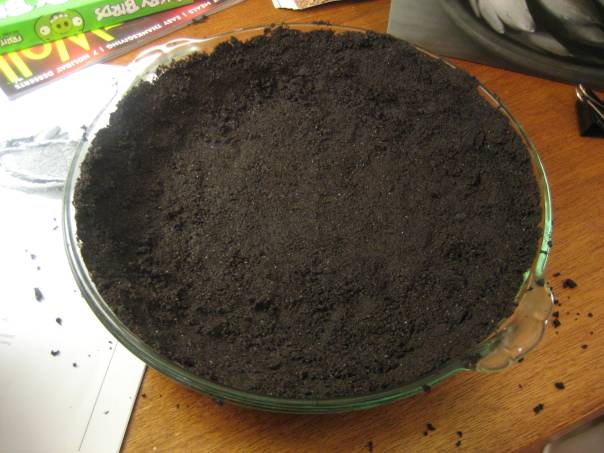
Refrigerate for 30 minutes. Once your crust has chilled, spoon 2 cups of melted ice cream on top of the crust.
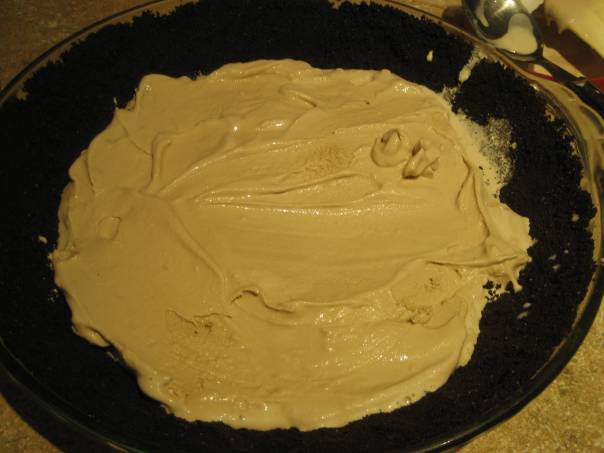
Drizzle the chocolate syrup in a zig zag pattern, and then swirl with a knife over the entire pie…. so pretty!
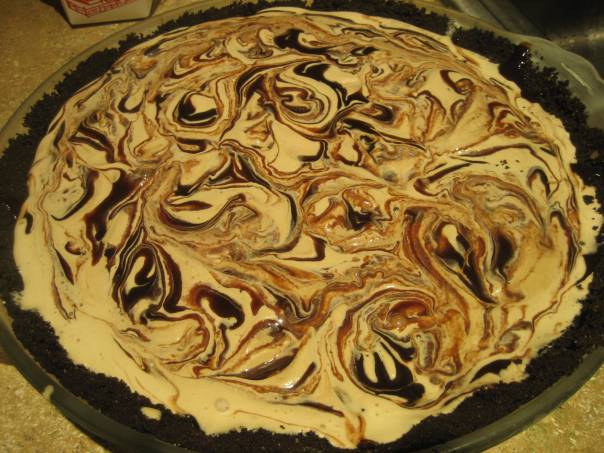
Carefully top with the remaining ice cream, add the chocolate sauce and swirl with a knife. Cover and freeze for 30 minutes. Remove from the freezer and cover the top of the pie with the thawed cool whip. Sprinkle the top with sliced almonds, if desired.

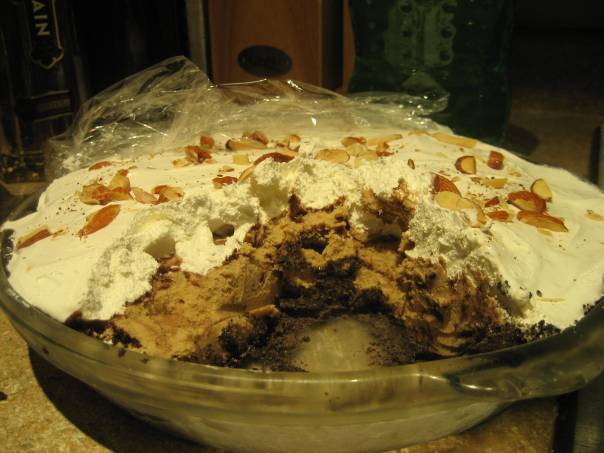
Cover and freeze. Remove from the freezer 10 to 15 minutes before serving. Grab your biggest knife and cut into this tasty frozen pie of sugar…
Serve it up on a plate and dig in with your fork! One bite is just not enough…
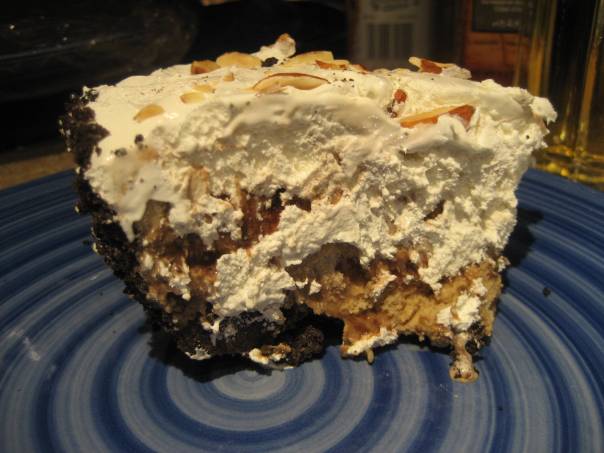
Be careful though, because after a slice of this pie (paired with a generous serving of beef wellington beforehand) this will surely send you into a food coma. I can promise though several layers of pure deliciousness from this entire meal!
Rustic Chicken Galette
I’ve been slacking in the food blog lately… partially from laziness, but partially because I’ve been uninspired in the culinary department until I came across a recipe for a savory galette. Anyway, today you get two-for-one, so happy food-ing!
Today’s second post is on a yummy chicken galette I made. What is a galette you say? Well that’s a great question! Galette isbasically a fancy French word (those French and their fancy things!) for a free-form, usually flat, crusty cake, or in my case – pie! I’ve only ever had a galette once, and it was a tasty pear galette that my sister made. So in mustering all my culinary inspiration, I actually thought a savory galette would be a great idea for dinner and a blog post! I present to you today, a rustic chicken galette. Aka, my fancy (French?) version of a chicken pie!
Our rustic ingredients: (well..most of them..brain fart and forgot to include a few more things before I snapped my photo)

– 2 to 3 cups of shredded rotisserie chicken (hooray for Costco and their $5 rotissere chickens!)
– 1 1/2 Tablespoons of butter
– 8 ounces of heavy cream
– chicken stock
– 3 teaspoons garlic
– parmesan
– parsley
– thyme
– 1 cup of thawed peas
– 1 onion, diced
– 1 to 2 cups of carrots, diced
– 1 to 2 cups of mushrooms, sliced
– 1 egg, lightly beaten
– 1 ready to bake pie crust
– salt and pepper for taste
Chop/dice your vegetables – carrots, onions, and mushrooms. In a large saucepan or pot, heat up the butter. Add the onions and carrots and cook for several minutes until they begin to soften.

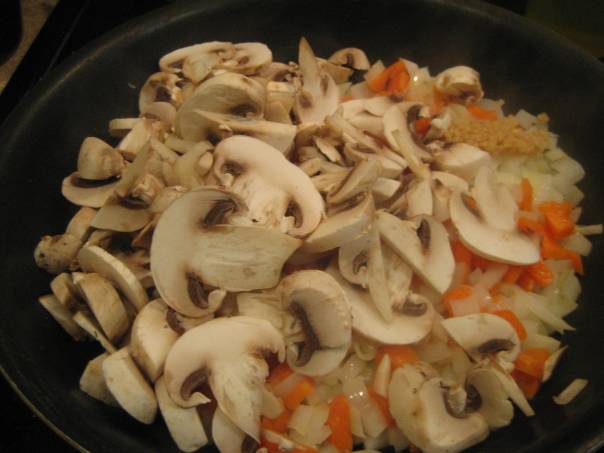
Add the sliced mushrooms and garlic and cook for several minutes until the garlic is infused, and the mushrooms begin to brown.

Then comes the herbs, cream, and stock…

Then the thawed peas..and last minute addition of corn….

Stir all the ingredients to combine well and cook the mixture to reduce the liquid by about 1/3. You want the liquid to thicken into a creamy, rich sauce….
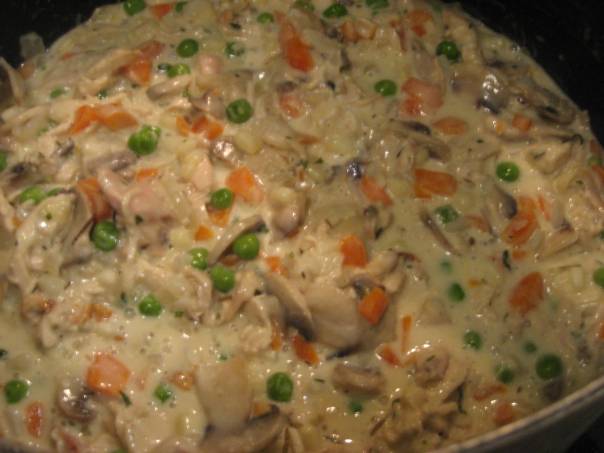
Because nothing screams FAIL like a liquidy pie! As the sauce begins to thicken add your parmesan cheese and salt and pepper to taste and remove from the heat. Meanwhile, prepare the galette crust. Unroll the pie crust and using a rolling-pin (or a glass if you don’t have one!) roll out the crust to make it a little bigger. Place your galette crust onto a cookie sheet and brush with the beaten egg. Once the chicken filling has cooled, spoon the filling on to the center of the crust…

Be careful not to “overfill” your galette so the crust doesnt split. You dont want to release all of the creamy deliciousness. To finish off the chicken galette, fold the edges of the crust towards the center, leaving the middle exposed. Top off with additional parmesan cheese, if desired.

Bake the chicken galette at 350 F for 25-30 minutes, or until the crust is golden brown and serve!
This is probably one of the most heavenly and divine chicken pie “things” I have ever eaten… It’s rich and creamy and you can taste the herbs in every bite! It’s a savory bite of goodness in your mouth and I’m actually drooling, thinking about how good this was! I can definitely see myself making this again in the near future..perhaps on a cold winter day to warm up my tummy and my soul!
A couple of tips.. you can make the crust from scratch which I might try next time. This go around, I was feeling particularly lazy after spending a day of hiking and scrambling over rocks. I would also actually cook the galette in a pie dish to retain the round form and to keep the juices in instead of flowing out onto the cookie sheet. Baking it in the pie dish will also make it easier to cut and serve! Anyway, if you love a really good and savory chicken pot pie of sorts (this one more free-form and open), definitely try this recipe out! But there is butter and cream involved so if you’re looking for a healthful meal, this is definitely not it.
I think I’ve found my culinary mojo again, so stay tuned because I promise an exciting blog post soon…involving puff pastry, mushroom pate, coffee ice cream and more! For now, bon appetit my foodie friends! 🙂
Potted Pumpkin Cream Pie
So, I’ve been dying to make this recipe since I came across the idea on Pinterest and have been waiting for the right time to make these! It’s such a cute and festive idea for individualized tasty treats. And the fun in this recipe is seeing the yummy layers in the “pot”. So here is my long-awaited post on Potted Pumpkin Cream Pie! Just in time for the Thanksgiving holiday..
The stars for the show:

– 1 1/2 cups of crushed graham crackers
– 6 Tablespoons melted butter
– 1/3 cup of sugar
– 2 packages of instant vanilla pudding mix (3.5 oz)
– 2 cups of cold milk
– 1 cup of frozen cool whip, thawed
– 1 tsp of pumpkin pie spice
– 1 cup of pumpkin puree
– Extra whipped topping
– Mason jars, (ribbon and labels optional)
Graham Cracker Crust
In a food processor, crush about 1 and 1/2 packages of the graham cracker. It should be finely crushed..and crumbly. Pour the 1 1/2 cups of finely crushed graham crackers into a small bowl and mix in the sugar and the melted butter.
Using your fingers, press them into the bottom of the mason jars and chill in the fridge for a few hours.
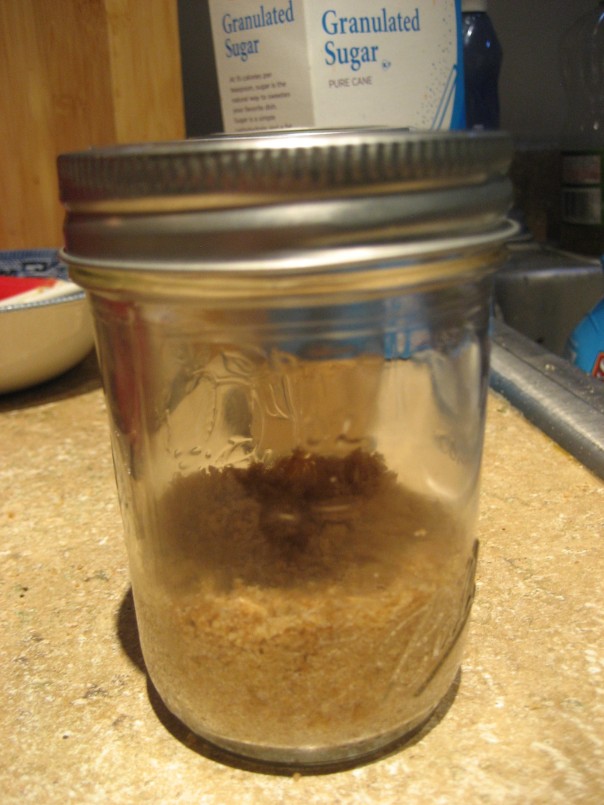
While the crust is chilling you can work on the filling!
Pumpkin Cream Filling
In a bowl, combine the instant pudding mix, pumpkin pie spice, cold milk, pumpkin puree and thawed whipped topping. Whisk together (you can also use an electric beater) for a couple of minutes until all the ingredients are combined.

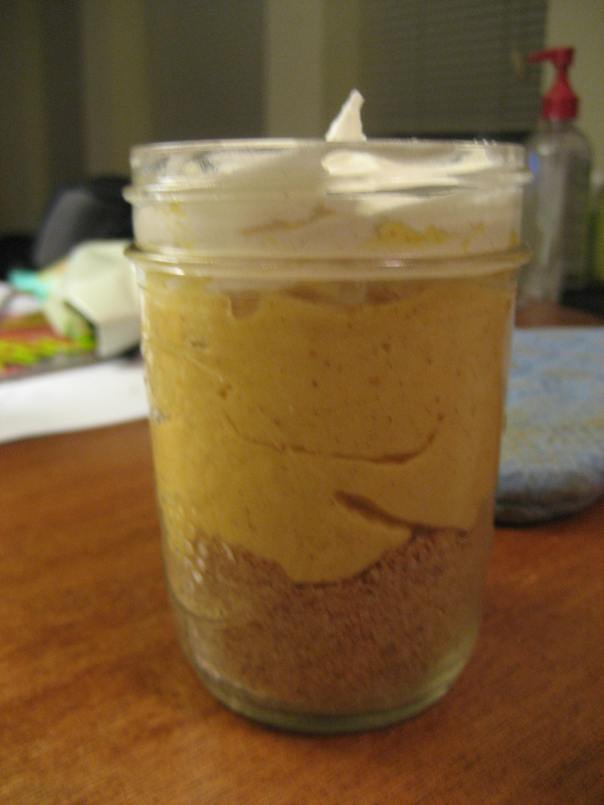
Spoon the delicious pumpkin concoction into the mason jars on top of the graham cracker crust. Top your pumpkin cream pie with a generous dollop of the remaining thawed cool whip. Let the remaining layers set in the fridge by chilling for at least 3 hours.
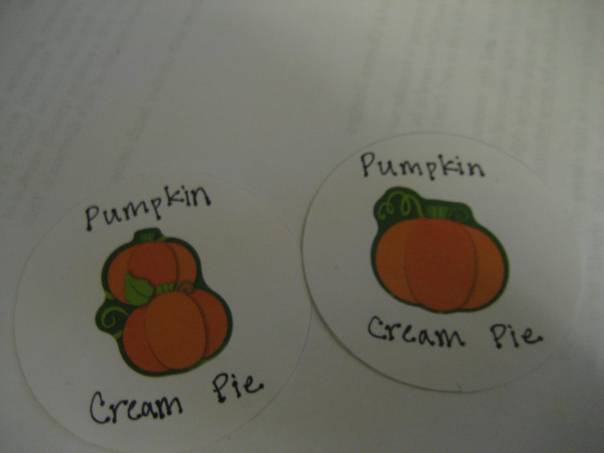
You can jazz up your pumpkin cream pie pots with a little ribbon and some fun labels! I don’t have a label maker, but I purchased some round labels and some pumpkin stickers. So with the creative juices flowing, I set off to hand-make labels for my pumpkin cream pie. Armed with my sharpie and stickers, I started churning out my homemade labels…

I liked the idea of using stickers because I was able to mix and match different sized pumpkins to make each label different. Slap your labels on to the lids and finish off your jazzed up “pots” with a fun and colorful ribbon. The result is a cute and mouth-watering potted pumpkin cream pie!
I took these into work for my co-workers and they ate them up! I didn’t actually taste these pies until a couple of days later, but oh-man were they good! After the first mouthful, I couldn’t put my spoon down! And the nice thing about these potted pies is that they are individual servings, so after eating your pot, you are less tempted to go back for more if it were in an actual pie form! Anyway, this is a great (and cute) idea for a holiday pie and I definitely know I’ll be making these again…maybe even mixing up the filling depending on the holiday. Perhaps, chocolate mint for Christmas?

